
You have probably noticed your factory fog light system dimming over time. Or maybe your vehicle did not come with fog lights at all, and you are wondering whether the upgrade is worth the effort. Installing or maintaining fog lights is not as complicated as most drivers assume. With the right knowledge, you can handle the job yourself and significantly improve your visibility in bad weather.
In our years of manufacturing automotive lighting at GTR, we have seen every installation mistake imaginable. We have also seen what happens when drivers neglect basic maintenance. This guide walks you through everything you need to know — from choosing the right fog light bulb to proper installation, ongoing maintenance, and staying legal on the road.
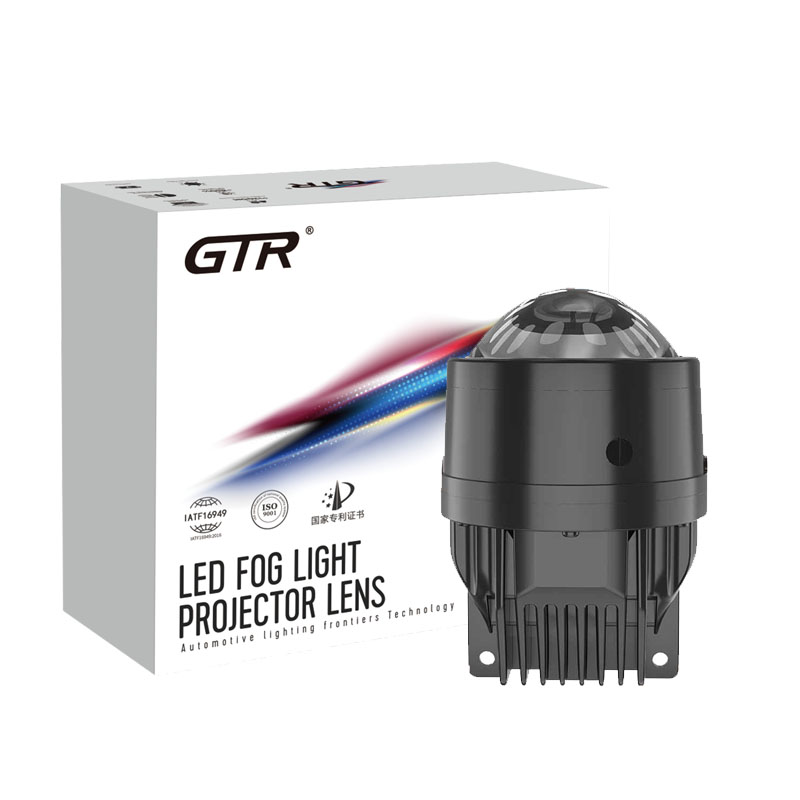
Why Your Fog Light System Matters More Than You Think
Fog lights are positioned low on your vehicle and emit a wide, flat beam pattern designed to illuminate the road surface without reflecting off fog particles back into your eyes. This unique design makes them essential safety components that can mean the difference between clear visibility and dangerous driving conditions.
The core purpose of a fog light is to help you see lane markings and road edges when visibility drops below 100 metres. Unlike headlights, which project light forward and create glare in fog, fog lights stay beneath the fog layer. When the fog light car symbol on your dashboard illuminates, it is telling you that your auxiliary lighting system is active. But that symbol does not tell you whether your bulbs are actually performing at peak efficiency.
Installation: Adding Fog Lights to Your Vehicle
Installing fog lights on a vehicle that does not have them already is trickier than replacing old fog lights. You will need to add wiring yourself and may have to drill holes for the lights. Most vehicles today, however, already have fog light mounting points in the bumper.
Before you begin any installation work, always disconnect your vehicle battery. This simple step prevents electrical shorts and protects both you and your vehicle’s electrical system.
Step-by-Step Installation Process
- Choose compatible fog lights: Verify your vehicle’s bulb size and socket type. Common sizes include H11, H16, H8, 5202, 9145, and 9009. Check your owner’s manual or use a bulb finder tool.
- Prepare mounting hardware: You will typically need an installation kit including brackets, wiring harness, relay, switch, and mounting bolts. If your vehicle lacks existing fog light openings, place the lights on your bumper and trace them, then cut holes to fit.
- Run the wiring: Run wires for the on/off switch into the vehicle. The wires go from inside the hood to the interior. Most vehicles already have a hole you can run these wires through. If not, you may need to drill a small hole yourself.
- Connect the electrical system: Connect the wiring harness to the car’s electrical system. There will typically be one power wire connecting to the on/off switch, a ground wire connecting to an unpainted metal section, and a third wire connecting to the relay and battery.
- Secure the lights: Mount the fog lights using the brackets provided with your kit. If your kit is designed for exterior mounting, attach the lights onto any metal part of your vehicle. Most trucks or SUVs have holes already in the grill or rack.
- Test before reassembly: Test the lights before reassembling all panels. Ensure the beam pattern is correct and the lights turn on and off properly.
For vehicles without existing fog lights, you will have to add some wiring yourself and may need to drill holes. If this sounds daunting, remember that most fog light kits come with detailed instructions. And if you are unsure about any step, professional installation is always an option.
Maintenance: Keeping Your Fog Lights Performing at Their Peak
Like all automotive components, fog lights require regular maintenance to perform at their peak. Road debris, salt, mud, and general grime can significantly reduce light output and create dangerous visibility issues.
Cleaning your fog light lenses every 30 to 60 days prevents haze buildup and maintains optimal light output. Start by removing loose debris with a soft-bristled brush, paying special attention to the areas around the housing seals and mounting points. Use a mild automotive soap solution and microfiber cloth to gently clean the lens surface, working in circular motions to avoid scratching.
For stubborn grime or oxidation, specialized lens restoration products can restore clarity to cloudy or yellowed fog light lenses. If clarity remains limited after basic cleaning, move to a sanding and polishing kit designed for polycarbonate lenses. A drill-powered restoration kit can provide even, consistent results. Finish with a protective sealant to prevent future oxidation.
Common Maintenance Mistakes to Avoid
- Using household abrasives or cleaners not designed for polycarbonate lenses
- Overheating the lens with excessive rubbing or high-speed sanding
- Skipping masking and risking paint damage around the fog light housing
- Rushing through steps, especially during sanding and polishing
- Handling new bulbs with bare fingers — oil from your skin can create hot spots that lead to premature failure
Pay particular attention to the housing seals during cleaning. Damaged seals can allow moisture intrusion that leads to internal fogging, corrosion, and electrical issues. Inspect for cracks, brittleness, or other signs of deterioration that might require replacement.
Bulb Replacement: When and How
Bulb replacement is one of the most common fog light maintenance tasks. Doing it correctly extends bulb life while maintaining optimal performance. The process begins with identifying the correct bulb type for your specific fog light system.
When handling new bulbs, always wear clean gloves or use a clean cloth to avoid transferring oils from your skin to the bulb surface. Oil residue can create hot spots that lead to premature failure. Before installing new bulbs, clean the electrical contacts with a wire brush or contact cleaner to ensure proper electrical connection. Apply a thin layer of dielectric grease to the contacts to prevent future corrosion.
If you are upgrading from halogen to LED, verify compatibility with your vehicle’s electrical system. LED fog light bulbs draw less power and last significantly longer than halogen. However, some vehicles may require CAN-bus adapters to prevent error messages on the dashboard.
Wiring Basics: Understanding Your Fog Light System
A proper fog light wiring diagram shows the complete electrical path from battery to bulbs. Understanding this diagram helps you troubleshoot issues and ensures safe installation.
The typical fog light wiring setup includes a power wire from the battery to a relay, a trigger wire from the switch to the relay, and output wires from the relay to the fog lights. The relay acts as a switch that handles the high current draw of the lights, protecting your vehicle’s electrical system.
When installed correctly with a relay and switch, fog lights typically do not significantly impact your car battery. The relay ensures that the lights only draw power when the switch is activated, preventing parasitic drain.
Legal Considerations: Staying Compliant on the Road
Fog light regulations vary by region. In Malaysia, the Road Transport Department (JPJ) enforces strict rules about fog light usage.
Fog lights should only be used when visibility drops below 400 metres, or roughly the distance of three lamp posts. Using fog lights in clear conditions is illegal and can result in fines up to RM 2,000 or imprisonment for up to six months. The MIROS (Malaysian Institute of Road Safety Research) recommends this visibility threshold as the appropriate trigger for fog light use.
Unauthorized lighting modifications — including colored lights or excessive neon underglow — can also result in fines. Before installing any aftermarket fog light system, verify that your chosen products comply with local regulations.
For those who encounter drivers misusing fog lights, JPJ accepts public complaints via email at aduantrafik@jpj.gov.my or WhatsApp at 013-4498997. Provide your name, address, identification number, and details of the incident including time, location, license plate number, and any supporting photos or videos.
Frequently Asked Questions About Fog Lights
What tools do I need for fog light installation?
You will typically need screwdrivers, a wrench set, wire strippers, electrical tape, and optionally a drill depending on mounting requirements. If you are cutting holes in your bumper, you may also need a hole saw or rotary cutting tool.
How often should I clean my fog lights?
Clean your fog light lenses every 30 to 60 days, or more frequently if you drive in dusty or muddy conditions. Regular cleaning prevents haze buildup and maintains optimal light output.
Can I install fog lights myself, or do I need a professional?
DIY installation is possible for enthusiasts with basic knowledge of car electronics and tools. However, professional installation is recommended for best results, especially if your vehicle lacks existing fog light wiring.
What is the difference between fog lights and driving lights?
Fog lights light up the ground immediately in front of your vehicle with a wide, flat beam. Driving lights allow for a much better view of the road ahead and have a more narrow dispersion area.
Will LED fog lights drain my battery?
No. When installed correctly with a relay and switch, LED fog lights typically do not significantly impact your car battery. In fact, LEDs draw less power than halogen bulbs, reducing the load on your electrical system.
What does the fog light symbol on my dashboard mean?
The front fog light symbol shows a lamp pointing left with diagonal lines through a wavy vertical line. It is typically green. The rear fog light symbol points right with horizontal lines through the wavy line and is usually amber. These symbols indicate that your fog lights are active.
How do I restore cloudy fog light lenses?
Start with a basic cleaning using a polishing compound and microfiber cloth. If clarity remains limited, use a sanding and polishing kit designed for polycarbonate lenses. Finish with a protective sealant to prevent future oxidation.
Why GTR Should Be Your Choice for Fog Light Upgrades
We have spent years engineering fog light solutions that address the specific challenges drivers face in tropical climates — heavy rain, high humidity, and sudden fog. Our CSP Mini LED bulbs deliver superior brightness while drawing less power than halogen. They are designed to mimic the size and shape of your original bulbs for perfect fitment.
Every GTR fog light product undergoes rigorous testing for durability in extreme weather conditions. We know that in Malaysia’s monsoon season, you need lights that perform when it matters most. Our bulbs are built to last, with lifespans that far exceed halogen alternatives.
And we stand behind our products with comprehensive warranty coverage. When you choose GTR, you are choosing lighting engineered by people who understand what drivers actually need on the road.
Your Next Step
You now understand the installation process, the maintenance requirements, and the legal considerations for fog light ownership. You know how to clean your lenses, replace your bulbs, and keep your system performing at its peak.
The only question that remains is whether you are ready to upgrade from your factory halogen system to the superior performance of LED. Visit https://www.rhgtr.in today and explore GTR’s complete range of fog light solutions. Find the perfect fit for your vehicle. And experience the difference that proper fog lighting makes — every time you drive in bad weather.