
You ordered your h11 led lamp kit. It arrived. You popped the hood, swapped the bulbs in fifteen minutes, and turned the headlights on. And something is wrong. The beam is scattered. The cutoff line is blurry. Or worse—you’re getting dashboard warnings and flickering.
You are not alone. Based on our years of manufacturing expertise and analysis of thousands of customer installations, the gap between a successful H11 LED upgrade and a frustrating one comes down to installation technique. Most guides gloss over the critical details—beam pattern alignment, dust cap clearance, CANbus integration—that separate a professional-grade install from a DIY disaster.
This guide walks you through every step, from preparation to final beam validation. No marketing fluff. No skipped steps. Just the practical knowledge you need to get your H11 LED upgrade right the first time.
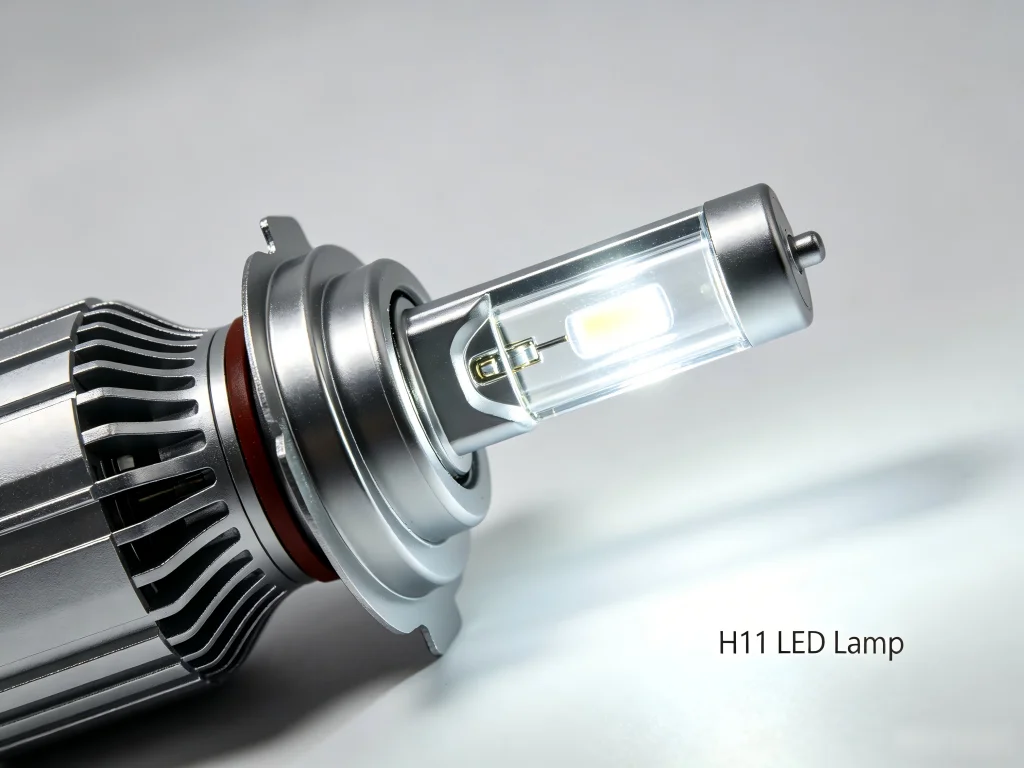
Before You Start: What You Need to Know About Your Vehicle
An H11 LED lamp upgrade requires three things to succeed: proper fitment, correct electrical integration, and precise beam alignment. Skip any of these, and your upgrade will underperform or fail entirely.
Start by confirming your vehicle uses H11 bulbs for the application you’re upgrading. The H11 socket is common for low beams and fog lights across thousands of vehicle models including Honda, Toyota, Nissan, Ford, Chevrolet, BMW, and Audi. Check your owner’s manual or use a fitment guide to confirm compatibility.
Next, identify your headlight housing type. Projector housings use a lens to focus light and create a sharp cutoff line. Reflector housings use a mirrored bowl to scatter light across the road. This matters because different housings respond differently to LED bulbs. Projector housings are more forgiving with beam pattern—they produce a sharp cutoff even with moderate chip alignment. Reflector housings are less forgiving and require precise emitter positioning to avoid glare.
Finally, check your dust cap clearance. Many LED bulbs have larger heat sinks or fans than halogen bulbs. If the cooling unit is too large, the factory dust cover may not fit back onto the housing, exposing components to moisture and dirt. Measure the available depth behind your headlight housing before purchasing.
Tools and Preparation
You don’t need a full workshop for this job. Here’s what you’ll actually need:
- Nitrile gloves—oil from your skin can damage LED emitters and reduce lifespan
- A flathead screwdriver—for beam adjustment on some vehicles
- Zip ties—for securing external CANbus adapters if needed
- A wall or garage door—for beam pattern testing
- Masking tape and a measuring tape—for marking reference points
Park your vehicle on a level surface and engage the parking brake. Turn the engine off and allow the headlight assembly to cool if you’ve been driving.
Step 1: Remove the Old Halogen Bulb
Open the hood and locate the H11 socket behind the headlight assembly. The exact position varies by vehicle, but it’s typically accessible from the rear of the housing.
- Remove the dust cover—twist it counterclockwise and set it aside
- Unplug the electrical connector—press the release tab and pull gently
- Release the wire retaining clip—if your vehicle has one, press it down and swing it out of the way
- Twist the halogen bulb counterclockwise—about a quarter turn, then pull it straight out
Do not touch the glass of the halogen bulb. The oils from your skin create hot spots that can cause the bulb to shatter. If you do touch it, clean it with rubbing alcohol before disposal.
Step 2: Install the H11 LED Lamp
Remove your new h11 led lamp from its packaging. Put on your nitrile gloves before handling the LED emitters.
- Align the tabs—the LED bulb’s mounting flange has three tabs that match slots in the socket. Insert the bulb with the tabs aligned correctly
- Twist clockwise to lock—you should feel a positive click when fully seated
- Reconnect the electrical plug—ensure it clicks into place securely
- Secure the retaining clip—if your vehicle has one, swing it back into position
Here is where many installations go wrong. The orientation of the LED chips matters. For projector housings, the chips should face left and right—3 o’clock and 9 o’clock—to produce a sharp cutoff line. For reflector housings, follow the manufacturer’s specific orientation recommendations. Some bulbs feature adjustable collars that allow you to rotate the emitter relative to the base for fine-tuning alignment.
If your bulb has a separate driver module, secure it with zip ties away from moving parts and heat sources. Do not let the driver dangle loosely.
Step 3: Test Before Reassembly
Before you put the dust cover back on, test the bulbs.
- Turn on your headlights—low beams first, then high beams
- Check for flickering—if the bulbs flicker, you likely have a CANbus issue
- Check for dashboard warnings—a “bulb out” message means the vehicle’s computer isn’t recognizing the LED’s power draw
If you see flickering or warnings, you need a CANbus solution. Many quality H11 LED bulbs include integrated CANbus decoders that mimic the halogen load. If your bulbs don’t have this feature, you’ll need external load resistors or a decoder harness.
One forum user described this exact scenario: “My replacement bulbs trigger the dash warning due to low resistance. I tried to add a resistor… They sent me a ‘CAN decoder’ that sits between the vehicle harness and the bulb. Eliminated any errors from the dash”.
Step 4: Dust Cover Fitment
This step is surprisingly problematic. LED bulbs with large heat sinks or fans may not fit under the factory dust cover.
If the dust cover doesn’t fit, you have three options:
- Use extended dust covers—available for many vehicle models, these provide additional depth
- Modify the existing cover—some drivers drill holes and use grommets to pass wires through
- Choose a more compact bulb—bulbs with mini designs are specifically engineered to fit tight housings
Do not leave the dust cover off. Moisture and dirt will enter the housing, potentially damaging the reflector or projector lens and reducing light output.
Step 5: Beam Pattern Alignment—The Critical Step Most People Skip
This is where professional installers separate themselves from amateurs. A poorly aligned beam pattern is dangerous—it reduces your visibility while blinding oncoming drivers.
Here is the proper beam pattern check procedure:
- Park 25 feet from a wall or garage door on a level surface
- Turn on your low beams—observe the light pattern on the wall
- Check the cutoff line—it should be sharp and horizontal, with a clear step on the right side (for left-hand drive vehicles)
- Check for hot spots and dark spots—the beam should be evenly distributed
If the cutoff is blurry or scattered, you need to adjust the bulb orientation. Some bulbs have rotatable collars that let you fine-tune the emitter position. Others require you to rotate the entire bulb in the socket.
One user reported: “When installing the instructions say to make sure each LED side is facing left/right (3 o’clock and 9 o’clock)… but it seemed to be preset to make them face up and down. … there’s a screw under the rubber ring” that allowed adjustment.
If adjustment doesn’t fix the pattern, the bulb design may not match your housing. Some bulbs simply don’t work well in certain reflector or projector designs.
Common Installation Mistakes and How to Avoid Them
Based on real customer experiences and our engineering testing, here are the most common installation errors:
- Skipping the beam pattern check—unsafe and illegal in many regions
- Buying bulbs with unrealistic lumen claims—they fail fast or flicker
- Forcing oversized heat sinks into the dust cap—creates gaps that let moisture in
- Touching the LED emitter with bare hands—oil contamination reduces lifespan and output
- Not testing before reassembly—you’ll have to take everything apart again if there’s an issue
- Ignoring CANbus compatibility—dashboard warnings and flickering are almost guaranteed on newer vehicles
One customer review captured the frustration perfectly: “Installing them is a just very little tricky because as I was trying to lock the bulbs in I notice it just kept moving and not catch”. This typically happens when the bulb isn’t seated correctly in the socket—take your time and ensure the tabs align properly.
Real-World Installation: What Drivers Are Saying
When installed correctly, quality H11 LED bulbs transform night driving. One reviewer noted: “They are much brighter, quieter, the headlight lens feels warmer for those who drive in snow. Also I’ve never been flashed by oncoming traffic with them”.
Another reported: “Beam cutoff was sharp after a 90° rotation. No dash errors; visibility improved noticeably on dark roads”.
The common thread across successful installations is attention to detail. Take the time to align the beam pattern. Address CANbus issues properly. Ensure the dust cover fits securely. These steps take an extra fifteen minutes but save hours of frustration down the road.
Frequently Asked Questions About H11 LED Lamp Installation
Why won’t my H11 LED bulb fit in the socket?
The tabs on the mounting flange may not be aligned correctly with the socket slots. H11 sockets have three slots at specific positions. Rotate the bulb until the tabs line up, then insert and twist clockwise. If the bulb still won’t seat, check that you have the correct bulb type—some vehicles use H11B variants with a different tab configuration.
How do I fix flickering H11 LED bulbs?
Flickering is almost always a CANbus or PWM compatibility issue. Your vehicle’s computer detects the lower power draw of LED bulbs and interprets it as a bulb failure. Solutions include integrated CANbus decoders (built into quality bulbs), external load resistors, or PWM anti-flicker modules.
Do I need to aim my headlights after installing H11 LEDs?
Yes, you should always check and adjust headlight aim after an LED upgrade. Even with perfect chip placement, different bulbs can shift the beam slightly. Park 25 feet from a wall and verify the cutoff line is sharp and at the correct height.
Why is my beam pattern scattered after installing H11 LEDs?
Scattered beam pattern typically means the LED chips are not positioned where the halogen filament was. This is the most common issue with LED retrofits. Adjust the bulb orientation so the chips face left and right (3 and 9 o’clock) for projector housings. If adjustment doesn’t fix it, the bulb design may not match your housing.
Can I install H11 LED bulbs myself?
Most H11 LED bulbs are designed for plug-and-play installation in 15-30 minutes. However, success depends on proper beam alignment and CANbus compatibility. If you’re not comfortable with basic automotive work, professional installation is recommended.
Do H11 LED bulbs need special dust covers?
Some vehicles require extended dust covers to accommodate the larger heat sink or fan on LED bulbs. Measure the available depth before purchasing. Many manufacturers offer compact designs specifically engineered for tight housings.
Why GTR Lighting Makes Installation Easier
After walking through all these installation details, you might appreciate why we engineered the GTR Lighting Ultra Series 3.0 the way we did.
Our H11 LED lamps feature a compact design that fits behind most factory dust covers without modification. The integrated CANbus compatibility works across thousands of vehicle platforms, eliminating the need for external resistors or decoder harnesses. The 1:1 chip placement means the beam pattern is correct right out of the box—no fiddling with rotatable collars or guessing at orientation.
Independent testing confirms the results: “The GTR Lighting Ultra 3 H11 delivered 920 max lux at the brightest point on the wall. That’s 475% brighter than stock. The beam pattern retains the sharp cutoff line that the projector housing is designed to produce”. Another reviewer concluded: “I found the beam pattern to be excellent, with a sharp cutoff that keeps light where it should be”.
Installation is straightforward. One reviewer noted: “Yes, the GTR Ultra 3 features a plug-and-play installation, meaning you can easily install it without needing any professional help”.
You have the knowledge now. You know what to avoid and what to prioritize. The only question left is which bulb to choose.
Visit https://www.rhgtr.in to find the GTR Lighting H11 LED lamp for your vehicle. Experience the difference that proper engineering makes—brighter roads, correct beam patterns, and installation that actually works the first time.