
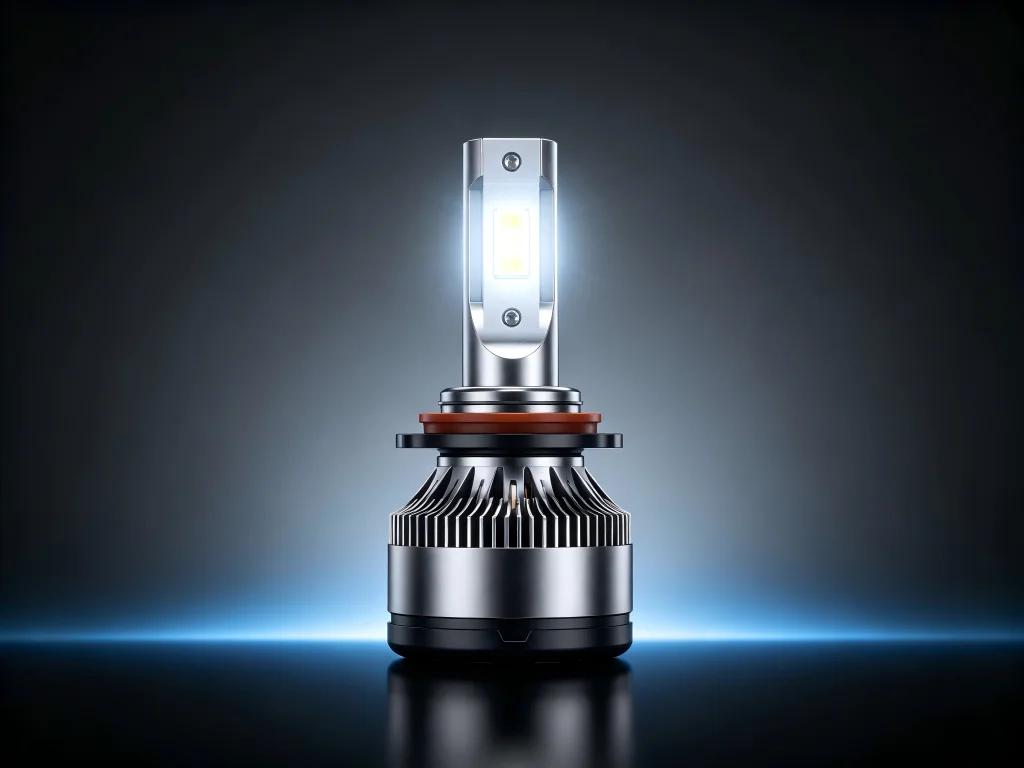
You‘ve got the box in your hands—a fresh pair of H11 LED headlight bulbs ready to replace those dim halogens. Now what? Most installation guides stop at “plug it in and twist.” But anyone who‘s actually done this knows the real work starts after the bulb is seated. Based on years of hands-on testing and thousands of real-world installs, we‘ve compiled everything you need to know—not just how to install an H11 LED headlight bulb, but how to make it perform like it should.
Before You Touch Anything: The Pre-Install Checklist
Installing an H11 LED headlight bulb isn‘t complicated—but skipping these three prep steps is why so many people end up frustrated.
First, confirm your vehicle actually uses H11 for the application you‘re upgrading. Many cars use H11 for low beams and a different bulb—like 9005 or H7—for high beams. Check your owner‘s manual or use a vehicle lookup tool at any auto parts retailer.
Second, gather your tools. You‘ll need:
- Gloves or a clean microfiber cloth (never touch LED chips with bare fingers—the oils can cause hot spots)
- A flathead screwdriver (for prying clips on some housings)
- A 10mm socket or wrench (some vehicles require removing the headlight assembly)
- Your phone camera (take a “before” photo of the old bulb orientation—trust us on this)
Third, park on level ground facing a flat wall or garage door about 20 feet away. Mark your current beam pattern with tape before you start. This gives you a reference point for adjustment after installation.
One more thing: if your vehicle has a CAN bus system (most 2010+ models do), you‘ll want bulbs with built-in decoders or have load resistors ready. We‘ll cover why this matters in the troubleshooting section.
Step-by-Step: Installing Your H11 LED Headlight Bulb
Accessing the Headlight Housing
Open the hood and locate the back of the headlight assembly. You‘ll see a dust cover—usually a round rubber or plastic cap ranging from 2 to 5 inches in diameter. Remove it by twisting counter-clockwise or prying gently with a flathead screwdriver.
Some vehicles require removing the entire headlight assembly to access the bulb. If this is your case, look for the retaining bolts (typically three per side) and set the assembly on a soft surface to avoid scratching.
Removing the Old Halogen Bulb
Unplug the electrical connector from the back of the halogen bulb, then twist the bulb counter-clockwise and pull it straight out.
Take a moment to examine the old bulb. Notice the orientation of the filament—it sits horizontally in most H11 applications. This matters because your new H11 LED headlight bulb needs to position its LED chips in that exact same plane to produce a correct beam pattern.
Set the old bulb aside. You‘ll want it for comparison when orienting the new one.
Installing the New LED Bulb
Align the LED bulb‘s tabs with the socket slots and insert it firmly. Twist clockwise to lock it in place.
Here‘s where most people make their first mistake: they rush to plug in the connector before checking orientation. The LED chips—the actual light-emitting surfaces—need to face left and right (3 o‘clock and 9 o‘clock positions) in most reflector housings. Some projector housings may prefer a different orientation, but left-right is the universal starting point.
If your bulb has an adjustable collar or clockable base, you can rotate the chip position independently of the locking mechanism. This is a game-changer for getting the beam right without buying a different bulb.
Once the bulb is locked in, connect the driver module to the vehicle‘s OEM harness. Most quality H11 LED headlight bulbs are non-polarity, meaning it doesn‘t matter which wire connects to which terminal. But if your bulb doesn‘t light up, flip the connector.
Securing the Driver and Dust Cover
This is the part that trips up even experienced installers. The driver module—that small aluminum box attached to the bulb—needs to be tucked inside the housing or secured outside with zip ties. Never leave it dangling where it can bounce against engine components.
Now for the dust cover: many H11 LED headlight bulbs are longer than halogens because of the cooling fan or heat sink. If your dust cover won‘t close, you have three options:
- Use a dust cover extension—aftermarket rubber caps that add 1–2 inches of clearance
- Modify the existing cover—cut a hole and seal around the bulb with adhesive or a grommet
- Choose a 1:1 mini-size bulb—some premium H11 LED bulbs match halogen dimensions exactly, eliminating fitment issues entirely
If you go with option two, make sure the hole is snug around the bulb. A loose seal lets moisture and dust into the housing—and that‘s a fast track to fogged lenses and failed bulbs.
Beam Pattern Adjustment: Where the Magic Happens
A properly adjusted H11 LED headlight bulb should produce a sharp cutoff line that slopes upward to the right (in left-hand drive markets) with no stray light above the cutoff.
Here‘s how to get there:
Turn on your headlights and observe the beam on the wall you marked earlier. If the beam pattern looks scattered, has dark spots, or projects light above your tape marks, you need to adjust.
For bulbs with adjustable collars: loosen the set screw, rotate the bulb body until the LED chips face left and right, and tighten. Some premium bulbs feature 360-degree adjustable mounting collars that let you fine-tune the beam without removing the bulb from the housing.
For fixed-orientation bulbs: you may need to remove the bulb and re-seat it at a different angle. The locking tabs on H11 sockets often allow two or three distinct rotational positions—try each one and check the beam.
If your beam still looks off after adjusting the bulb, check your vehicle‘s headlight leveling adjustment screws. These are usually located on top or behind the housing and allow vertical and horizontal aim correction. Never adjust these to compensate for a bulb that‘s fundamentally misaligned—that‘s a band-aid on a broken bone.
One Reddit user captured the frustration perfectly: “The instructions say to make sure each LED side is facing left/right (3 o’clock and 9 o’clock)… but it seemed to be preset to make them face up and down”. If your bulb is preset incorrectly, return it and buy one with a proper adjustable base.
Thermal Management: Why Your Bulb‘s Lifespan Depends on Cooling
LEDs generate heat at the chip junction. Without proper cooling, that heat builds up, and the bulb loses brightness—permanently. We‘ve seen H11 LED headlight bulbs fail in under three months simply because the cooling system couldn‘t keep up with the heat load.
There are two main cooling approaches in H11 LED headlight bulbs:
Active cooling (fans): These pull heat away from the chips using a small fan. They‘re effective but introduce noise and a moving part that can fail. Some users report fan noise audible inside the cabin—if silence matters to you, test before committing.
Passive cooling (heat sinks): These use aluminum or copper heat sinks to radiate heat without moving parts. Aviation-grade aluminum heat sinks are the industry standard for durability. Some premium designs use pure copper heat belts for maximum thermal conductivity.
The best H11 LED headlight bulbs use hybrid approaches: efficient heat sink designs with fans that only spin when needed. Look for copper substrates and ceramic circuit boards—these materials transfer heat more efficiently than standard aluminum.
One critical point: if you modify your dust cover, make sure you‘re not restricting airflow to the heat sink. Sealed housings with no airflow can cause overheating even with the best cooling design.
Troubleshooting: Fixing the Most Common H11 LED Issues
Flickering or Hyperflashing
Flickering almost always means your vehicle‘s CAN bus system isn‘t detecting the proper electrical load. Halogen bulbs draw more current than LEDs, so the computer thinks the bulb is burned out and pulses power to test it.
The fix: use bulbs with built-in CAN bus decoders, or add external load resistors. Some vehicles require more sophisticated “super decoders” that handle PWM (pulse-width modulation) systems where standard decoders fail.
One user noted: “This product normalizes the voltage to the lights and stops the flicker. They ‘seem brighter’ because the voltage is now continuous”. That‘s exactly what a good decoder does—it provides stable, uninterrupted power.
Dashboard Error Messages
Same root cause as flickering. If your bulb is otherwise working but the dashboard says “Bulb Out” or “Check Headlight,” you need CAN bus compatibility. Many premium H11 LED headlight bulbs include this functionality built-in, eliminating the need for separate resistors or harnesses.
No Light Output
Check the connector polarity—LEDs are diodes, so they only work when current flows in the right direction. If flipping the connector doesn‘t help, test the bulb in the other side‘s housing to rule out a vehicle-side issue. If the bulb still doesn‘t light, it‘s defective—return it.
Poor Beam Pattern
We covered adjustment above, but here‘s the checklist: LED chips facing left/right (most common), bulb seated fully in the socket, dust cover not interfering with the bulb‘s position, and no debris blocking the lens.
Reading the Specs: What Actually Matters
Every H11 LED headlight bulb box screams about lumens. But lumens alone don‘t tell you how well the bulb performs on the road. Here‘s what to look for:
Color temperature—measured in Kelvin (K). 5,000K to 6,500K produces a pure white or cool white light that improves contrast and reduces eye strain. Below 4,000K looks yellowish (like halogen). Above 7,000K looks blue and reduces visibility in rain and fog.
Beam pattern design—look for “1:1 design” or “halogen filament position matching.” This ensures the LED chips sit exactly where the halogen filament used to be.
Driver quality—the driver module regulates voltage and handles CAN bus communication. A poor driver causes flickering, RF interference, and premature failure. Premium drivers use potted electronics that resist vibration and moisture.
Waterproof rating—IP65 or higher is standard for H11 LED headlight bulbs. This matters because headlight housings aren‘t perfectly sealed—moisture can get in, and you don‘t want it reaching the electronics.
Frequently Asked Questions About Installing H11 LED Headlight Bulbs
Can I install H11 LED headlight bulbs myself?
Yes—most installations take 15 to 30 minutes with basic hand tools. The process is straightforward: remove the dust cover, unplug and remove the old bulb, insert the new bulb, connect the driver, and secure everything. Some vehicles with tight housings may require more time or dust cover modification.
Why do my H11 LED bulbs flicker after installation?
Flickering is typically caused by CAN bus incompatibility. Your vehicle‘s computer pulses power to check bulb status, and LEDs don‘t draw enough current to satisfy the system. Use bulbs with built-in decoders or add load resistors to fix the issue.
How do I adjust the beam pattern on H11 LED bulbs?
Rotate the bulb so the LED chips face left and right (3 and 9 o‘clock). If your bulb has an adjustable collar, loosen the set screw, rotate to the correct position, and retighten. Some bulbs allow 360-degree adjustment for perfect alignment.
Will H11 LED bulbs fit in my dust cover?
It depends on the bulb‘s length and heat sink design. Many H11 LED bulbs are longer than halogens. If your dust cover won‘t close, you may need an extension cap, modification, or a 1:1 mini-size bulb that matches halogen dimensions.
Do I need load resistors for H11 LED headlight bulbs?
Only if your bulbs don‘t have built-in CAN bus decoders. Premium H11 LED headlight bulbs include error-free drivers that work with most CAN bus systems. If you‘re using budget bulbs without decoders, you‘ll need external load resistors to prevent flickering and error codes.
How long do H11 LED headlight bulbs take to warm up?
LEDs are instant-on—they reach full brightness immediately. Unlike HID bulbs that take 5–15 seconds to warm up, an H11 LED headlight bulb produces full output the moment you turn it on.
Why do my H11 LED bulbs look dimmer than halogens?
This usually indicates poor beam pattern or incorrect orientation. The bulb may be producing plenty of light, but if it‘s scattering instead of projecting, it won‘t illuminate the road effectively. Check your orientation and adjust the beam pattern.
Get It Right the First Time
Installing an H11 LED headlight bulb isn‘t rocket science—but it‘s also not as simple as “plug and pray.” The difference between a frustrating experience and a perfect upgrade comes down to preparation, orientation, and choosing a bulb designed for real-world conditions.
At GTR, we engineer our H11 LED headlight bulbs to match halogen dimensions exactly—no dust cover modifications, no fan noise, no CAN bus errors. Just plug them in, adjust the beam, and drive.
Explore GTR‘s H11 LED headlight bulb collection and see what happens when installation meets engineering.