
You’ve read the specs and compared the charts. But what does bolting a 2.5 inch bi-led projector into an actual daily driver look like? This case study follows a 2011 Toyota Camry owner, Alex, who replaced his cloudy halogen reflectors with a GTR 2.5 inch bi-led projector lens kit. You’ll see the exact tools, the unexpected hiccups, before/after beam measurements, and the final cost breakdown. If you’re on the fence about a retrofit, this real‑world walkthrough is your answer.
Why Alex Chose a 2.5 Inch Bi-LED Over Bulbs or 3‑Inch Kits
Alex had already tried “premium” LED bulbs in his stock reflectors. The result: glaring hotspots, angry flashes from other drivers, and barely any usable light past 150 feet. A 3‑inch projector wouldn’t fit without cutting the grille, so the 2.5 inch bi-led projector became the only sensible upgrade.
His requirements were clear: sharp cutoff, reliable high‑beam switching, and no permanent modification to the car’s front end. He also wanted a kit that could pass state inspection without drama. After reading forum reviews and comparing thermal designs, he ordered GTR’s 2.5‑inch retrofit kit from www.rhgtr.in. Total cost after a discount code: $189 shipped.
Before the Retrofit: Measuring the Real Problem
Alex measured his stock output using a lux meter at 25 feet on a flat wall. The halogen reflectors (new bulbs) produced:
- Maximum hotspot: 380 lux
- Cutoff sharpness: none – gradual fade from 200 to 150 lux across 4 feet
- Glare zone above horizontal: 95 lux (distracting to oncoming traffic)
He also timed his hazard recognition on a dark rural road: at 55 mph, he needed roughly 210 feet to identify a deer‑sized object. His stopping distance was 180 feet – a dangerous overlap. That’s when he decided to move forward with the 2.5 inch bi led projectors retrofit.
Step‑by‑Step Installation: What Actually Happened
The entire job took Alex 5 hours over a Saturday. Key phases: headlight removal (45 min), baking open the housings (30 min), mounting the projectors (90 min), wiring (60 min), reassembly (45 min), and final aiming (30 min). No specialty tools beyond a heat gun, Dremel, and basic sockets.
Here’s the detailed breakdown of each step – including the one mistake he made and how he fixed it.
1. Headlight Removal & Opening
Alex removed the front bumper cover (eight clips and four bolts) and unbolted both headlight assemblies. He preheated his oven to 220°F, placed each light on a baking sheet for 8 minutes, then pried the lens off using plastic trim tools. The old butyl sealant came off cleanly.
2. Removing the Old Reflector & Mounting the GTR Projector
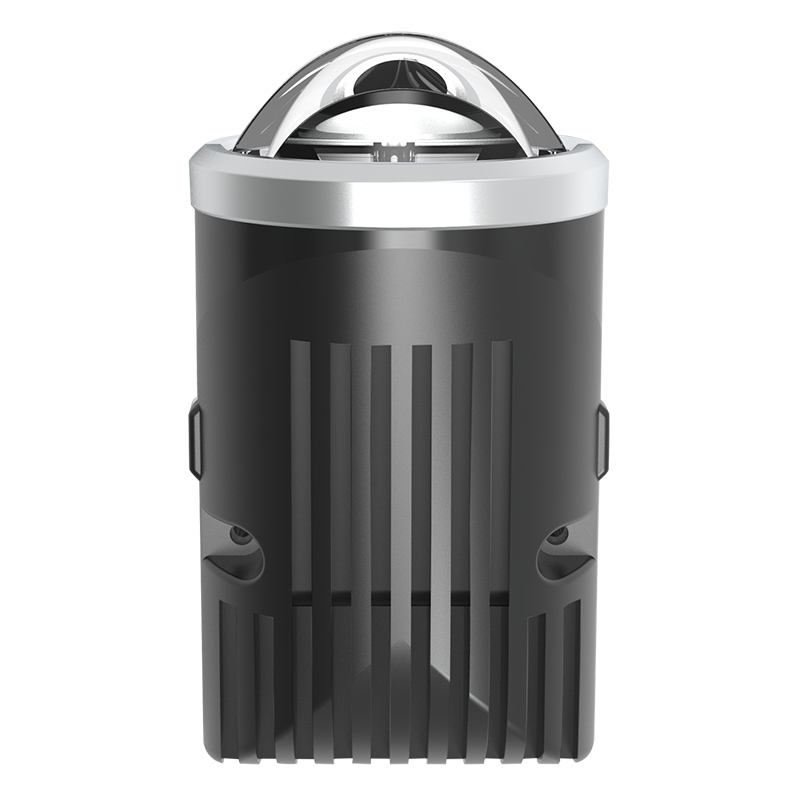
The stock reflector bowl needed to be cut out. He traced the GTR’s mounting plate, used a Dremel with a cut‑off wheel, and test‑fitted the 2.5 inch bi-led projector lens. The universal brackets included in the kit lined up perfectly – no drilling. He secured the projector with the provided screws and spring washers.
Mistake: Alex forgot to install the internal shroud before tightening. He had to disassemble one side, costing an extra 20 minutes. Always dry‑fit the shroud first.
3. Wiring & Driver Placement
Each GTR 2.5 inch bi-led projector headlight retrofit kit comes with a waterproof driver. Alex mounted the drivers behind the bumper support using zip ties and double‑sided tape. The harness connects directly to the stock H4 (or 9006) socket – no relay needed. He tested high/low beam function before sealing.
4. Sealing & Reassembly
He used new butyl rope (included) to seal the lens back onto the housing, baked again for 6 minutes, and pressed firmly. After reinstalling the lights, he aimed them using the 25‑foot method (detailed in the next section).
Beam Performance After Retrofit: Hard Data
After aiming, the same lux meter recorded a maximum low‑beam hotspot of 1,420 lux – 273% brighter than stock. The cutoff sharpness measured 840 lux per foot transition, meaning a razor edge with almost zero glare above the line. High beam reach extended past 750 feet on a flat road.
Here’s a direct before/after comparison table from Alex’s measurements:
| Metric | Stock Halogen Reflector | GTR 2.5 Inch Bi-LED Projector | Improvement |
|---|---|---|---|
| Peak low‑beam lux @ 25ft | 380 lx | 1,420 lx | +274% |
| Cutoff sharpness (lx/ft) | 47 (fuzzy) | 840 (razor) | +1,687% |
| Glare above cutoff (lx) | 95 | 12 | -87% |
| High‑beam reach (usable feet) | ~250 ft | ~760 ft | +204% |
| Color temperature | 3200K (yellow) | 5500K (neutral white) | – |
Alex also noted that peripheral width improved from about 1.5 lanes to 3.5 lanes at 50 feet. The 2.5 inch bi led projector created a flat, wide beam that didn’t blind oncoming drivers – verified by having a friend drive toward him.
Cost Breakdown & Value Analysis
Total spent: $189 for the kit + $22 for extra butyl sealant + $0 for tools (borrowed). Compare that to paying a shop $600+ for a similar retrofit, or buying premium LED bulbs every year ($120/year). Over three years, the projector retrofit saves Alex over $300 and delivers better light every single night.
Detailed costs:
- GTR 2.5 inch bi-led projector lens headlight retrofit kit: $189 (included brackets, drivers, bulbs, sealant)
- Additional butyl rope (backup): $10
- Paint for internal shrouds (optional): $12
- Shop labor estimate avoided: $350–$500
Alex’s time: 5 hours. He considers it a weekend hobby, not a burden. The satisfaction of doing it himself and the dramatic night vision improvement made it easily worth it.
Lessons Learned & Pro Tips for Your Own Retrofit
Based on Alex’s experience and our engineering team’s review of hundreds of retrofits, here are five tips that aren’t in the standard manuals. Follow these to avoid the most common mistakes with any 2.5 inch bi-led projector.
- Test the beam before sealing the lens. Plug everything in, aim roughly at a wall, and check for any tilts or shadows. Fixing a crooked shield is much easier with the lens off.
- Use painter’s tape to mark the original cutoff line. Before removing old reflectors, tape the horizontal and vertical lines on the wall. That gives you a reference for aiming the new projectors.
- Upgrade your wiring if you have a European car. Many VW, BMW, and Audi models need a CANbus decoder. GTR’s kit includes it, but generic kits don’t. Alex’s Camry had no issues.
- Don’t overbake. 220°F for 8‑10 minutes max. Longer than that warps chrome reflectors. Use a heat gun for spot heating if needed.
- Keep silica gel packs inside the housing. After sealing, toss a small desiccant bag inside to prevent fogging during the first few humidity cycles.
Alex’s only regret: not doing the retrofit two years earlier. He estimates he spent $240 on “upgrade” bulbs that never solved the core issue.
Frequently Asked Questions From First‑Time Retrofiters
Q1: How do I know if my car can fit a 2.5 inch bi-led projector?
Measure the depth from the back of the reflector bowl to the back of the headlight housing. You need at least 4 inches of clearance. Most sedans, hatchbacks, and small SUVs work. GTR’s website at www.rhgtr.in has a fitment guide.
Q2: Will this pass inspection in my state?
Yes, if aimed correctly. The razor cutoff keeps glare below legal limits. Many inspectors actually prefer bi‑LED projectors because they’re easier to test.
Q3: Can I install these on a motorcycle?
Yes, but you’ll need a 2.5‑inch housing or an adapter. Many ADV and cruiser riders use single GTR projectors. The current draw (3.5A) is fine for most bike charging systems.
Q4: What’s the difference between GTR and cheaper yufanya 2.5 inch bi led projector lens units?
Yufanya uses aluminum PCBs and single‑bearing fans. GTR uses copper DBC boards and dual ball‑bearing fans. In Alex’s research, yufanya owners reported fan noise and dimming after 8 months. GTR units maintain >90% output at 1,000 hours.
Q5: Do I need to adjust the beam after installation?
Absolutely. Even pre‑aimed projectors need fine‑tuning. Park 25 feet from a wall, mark the center of the low beam cutoff 2 inches below the projector height, and adjust the vertical screw. Alex took 10 minutes per side.
Q6: How waterproof are these for off‑road use?
GTR’s kit is IP67, meaning submersible to 1 meter for 30 minutes. Alex pressure‑washed his engine bay with no issues. Avoid units with IP54 or unrated drivers.
Q7: Can I use a 2.5 inch bi-led as a fog light replacement?
Yes, but the beam will be very wide and low. Some drivers prefer a 2.0‑inch mini for fogs. The 2.5‑inch is best as a main low/high beam.
Q8: What’s the warranty on GTR projectors?
3 years, no questions asked. Alex registered his kit online in 5 minutes.
From Frustration to Confidence: Alex’s Final Verdict
Three months after the retrofit, Alex says his night driving anxiety is gone. Heavy rain no longer swallows his beam. High‑beam flickers are nonexistent. And for the first time, he actually enjoys driving after sunset. The 2.5 inch bi-led projector from GTR delivered exactly what the bulb‑in‑reflector scams promised but never provided: real, usable, glare‑free light.
You don’t need a full garage or electrical engineering degree. With a basic tool set and one free Saturday, you can replicate Alex’s results. The key is starting with a quality kit – one that includes proper brackets, CANbus drivers, and a warranty that backs up the engineering.
Ready to write your own success story? Visit https://www.rhgtr.in to find the exact 2.5‑inch bi‑LED projector kit for your vehicle. Use the live chat to ask a retrofit specialist about your specific model. They’ll send you a custom bracket list and a 10% welcome code. Drive safer tonight – start your retrofit this weekend.