
You just spent forty-five minutes contorting your arm behind the headlight assembly, your knuckles scraped raw against the radiator support. You finally got the new h7 bulb in. You plug the h7 bulb connector back in, flip the switch, and… nothing. Or worse—a weak, scattered beam that barely lights the road ten feet ahead.
This happens more often than you’d think. And in most cases, it’s not the bulb’s fault.
Based on our years of manufacturing expertise and countless conversations with frustrated drivers, we’ve identified seven installation mistakes that turn a simple bulb replacement into a recurring headache. Here’s how to avoid every single one.
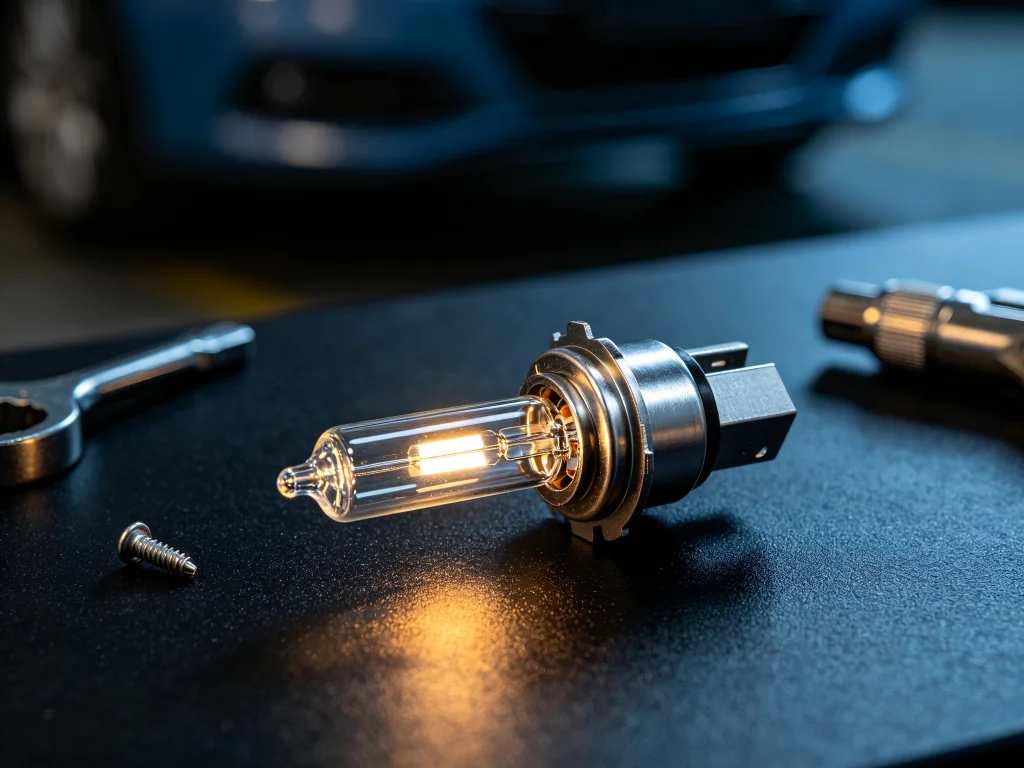
Mistake #1: Forcing the Spring Clip
Direct Answer: The H7 bulb retainer clip should click into place with minimal pressure. If you’re forcing it, the bulb isn’t seated correctly—and that misalignment will cause vibration damage and premature failure within weeks.
The H7 uses a metal spring clip or plastic retainer to lock the bulb into the h7 bulb holder. This clip isn’t just a convenience feature—it’s critical for maintaining the bulb’s position relative to the reflector. When the clip isn’t fully engaged, the bulb can shift during driving. Every bump, every pothole, every expansion joint on the highway vibrates that bulb just enough to weaken the filament or misalign the beam pattern.
What does a misaligned beam look like? Uncontrolled scattering of light that blinds oncoming traffic and leaves the road surface dangerously under-illuminated. If the clip doesn’t snap with a satisfying click, you haven’t seated it right.
Mistake #2: Touching the Glass Envelope
This is the oldest rule in the book, and yet it still happens constantly. Your skin produces natural oils. When those oils transfer to the glass envelope of a halogen H7 bulb, they create hot spots during operation. The glass heats to over 500°F, the oil burns, and the resulting temperature differential causes the glass to crack or the bulb to fail prematurely.
If you’ve already touched the glass, clean it with isopropyl alcohol and a lint-free cloth before installation. Better yet: wear gloves during the entire process.
Mistake #3: Ignoring the Adapter Your Vehicle Requires
Here’s where things get complicated. Not every H7 bulb installs the same way. While most vehicles use a standard metal clip that snaps directly into the h7 bulb socket, certain models—including Volkswagen, BMW, Audi, Mercedes-Benz, and Hyundai—use a plastic base combined with a metal retainer ring. The bulb must first be inserted into a dedicated plastic holder, and then the entire assembly twists into the housing.
Some vehicles feature a three-tab twist-in socket that requires a matching three-prong retainer ring. Others have such tight internal space that standard adapters paired with LED bulbs simply won’t fit.
This is why checking h7 bulb Halfords or h7 bulb Autozone compatibility charts isn’t always enough. You need to know your vehicle’s specific h7 bulb holder design before you buy.
Mistake #4: Installing the Bulb in the Wrong Orientation
The H7 bulb uses a PX26d base with a dedicated locking tab that ensures precise positioning. But here’s the catch: the bulb can be installed in multiple orientations in some housings. If you rotate it even slightly off the correct position, the beam pattern scatters.
For LED H7 bulbs, orientation is even more critical. The LED chips need to sit at exactly the same position as the halogen filament—typically the 3 o’clock and 9 o’clock positions for optimal beam pattern. Install them at 12 and 6, and you’ll get a blurry cut-off line and unfocused beams.
Pro tip: Before removing your old bulb, note the orientation of the alignment tab. If the tab sits at 12 o’clock, you need an H7A-style bulb where the wire lands at 6 o’clock.
Mistake #5: Replacing Only One Bulb
Halogen bulbs degrade at similar rates. If one H7 bulb has failed, the other is almost certainly nearing the end of its life. Replacing only one bulb means you’ll be back under the hood within weeks or months, doing the same job all over again.
Replace in pairs. Always. It saves time, money, and frustration in the long run.
Mistake #6: Ignoring the Condition of Your Socket and Connector
A degraded h7 bulb socket or corroded h7 bulb connector is the hidden killer of new bulbs. Over time, the metal spade terminals in the PX26d socket lose their spring tension. Each insertion wears them down a little more. When the connection becomes loose, it creates electrical resistance, which generates heat, which further degrades the connector.
The result? Voltage fluctuations that shorten bulb life, intermittent failure, and in severe cases, melted wiring harnesses.
Before installing your new H7 bulb, inspect the socket and connector. Look for:
- Corrosion or green buildup on the terminals
- Melted or deformed plastic in the connector housing
- Loose-fitting terminals that don’t grip the bulb base firmly
If you find any of these issues, you may need to replace the connector or the entire wiring harness section. Some aftermarket suppliers offer high-temperature headlight wiring harnesses with 14-gauge wire and plug-and-play functionality that connects between the factory harness and the new bulb.
Mistake #7: Choosing the Wrong Bulb Technology for Your Housing
This mistake is epidemic. Drivers see the h7 bulb price of a cheap LED kit and think they’re getting a bargain. Then they install it in a halogen reflector housing and discover that the beam pattern is terrible—or worse, they’re blinding every oncoming driver.
LED and HID bulbs have different light source positions and shapes compared to halogen filaments. If the LED chip or HID arc isn’t in exactly the same position as the halogen filament, the reflector or projector can’t focus the light properly. The result is glare for other drivers and reduced visibility for you.
If you’re upgrading to LED, look for bulbs with “1:1 design” or “halogen beam pattern” in the product description. These terms indicate the manufacturer has matched the LED position to the original filament location.
What the Forums Are Saying
Real drivers, real frustrations:
“I’ve not put the connector back on the way it came off… H7 bulbs identical to halogen master, same size, plug and play as you’d expect.”
The problem? “Same as any other halogen” isn’t good enough when your socket is degraded or your vehicle requires a specific adapter.
Another driver shares: “The H7 bulb has a metal spring clip or a plastic retainer holding it in place. Release the retainer. Gently unclip or unscrew the clip holding the bulb.” Sounds simple. But if that clip is bent, corroded, or the wrong type, the bulb will never seat correctly.
One forum post captures the frustration perfectly: “I was able to install the new H7 bulb in about 10 minutes. No dismantling required whatsoever.” The key? They had the right bulb for their specific vehicle—and they knew what they were doing.
The GTR Difference: Engineering That Prevents These Mistakes
Every one of these seven mistakes is preventable. And that’s exactly how GTR designs its H7 bulbs.
Our bulbs feature:
- Precision-machined PX26d bases that fit your h7 bulb socket perfectly on the first try—no forcing, no guessing
- 1:1 halogen-match design that ensures correct beam pattern without the glare issues that plague cheap LED replacements
- Corrosion-resistant terminals that maintain tension through multiple insertions
- Comprehensive vehicle compatibility that accounts for the specific h7 bulb holder and h7 bulb retainer clip designs used by different manufacturers
And if you’re shopping by h7 bulb price alone, remember this: the cheapest bulb is rarely the cheapest in the long run. When you factor in the cost of repeated replacements, the time spent installing them, and the safety risk of driving with poor headlights, a quality bulb from a reputable manufacturer is the better investment.
Frequently Asked Questions About H7 Bulb Installation
Why won’t my new H7 bulb fit into the socket?
This usually means your vehicle requires a specific adapter or retainer clip that isn’t included with the bulb. Some European and Korean vehicles—including VW, BMW, Audi, and Hyundai—use a plastic base with a metal retainer ring that’s different from the standard H7 clip. Check your original bulb’s base for any additional plastic ring or frame that isn’t permanently fixed to the bulb.
Can I install an H7 LED bulb without an adapter?
Yes, if your vehicle uses a standard spring clip socket and the LED bulb is designed as a 1:1 replacement. However, many vehicles require specific adapters. Always check your vehicle’s headlight housing design before purchasing.
Why is my new H7 bulb dimmer than the old one?
The most common cause is incorrect orientation—the bulb isn’t seated properly in the holder, or the alignment tab is in the wrong position. Check that the bulb is fully inserted and the retainer clip is securely engaged. For LED bulbs, verify that the chips are oriented at 3 and 9 o’clock.
How do I know if my H7 socket is damaged?
Look for corrosion on the terminals, melted plastic, or terminals that don’t grip the bulb base firmly. A degraded socket will cause voltage fluctuations that shorten bulb life and may eventually damage the wiring harness.
What’s the correct way to remove an H7 bulb?
First, disconnect the electrical connector. Then release the metal clip or retaining spring by pushing it forward or unhooking it. Remove the old bulb carefully, avoiding any twisting that might break the connector. Never touch the glass of the new bulb during installation.
Are H7 bulbs interchangeable with other bulb types?
No. H7 uses a PX26d metal base with two exposed spade terminals—completely different from H11 (PGJ19-2 plastic base) or H4 (P43t base). Always verify your vehicle’s required bulb type before purchasing.
Stop Making These Mistakes. Start Driving With Confidence.
You don’t need to be a mechanic to replace an H7 bulb correctly. You just need the right information—and the right bulb.
GTR bulbs are engineered to eliminate the guesswork. Precision fitment. Correct beam patterns. Components that work with your vehicle’s specific h7 bulb holder and h7 bulb connector design. And the durability to keep you on the road, not under the hood.
Ready to replace your H7 bulb the right way? Visit https://www.rhgtr.in to find the bulb that fits your vehicle perfectly—and never make these installation mistakes again.
Your time is valuable. Your safety matters. Choose the bulb that’s engineered to work—from the first installation to the ten-thousandth mile.