
Most guides tell you what to buy. Very few tell you how to install it, how to aim it, and how to keep it performing at its peak three years down the road. That gap is exactly what this handbook fills. If you already understand the basics of LED fog light technology, this is the next step: a practical, hands-on manual for getting the most out of your upgrade.
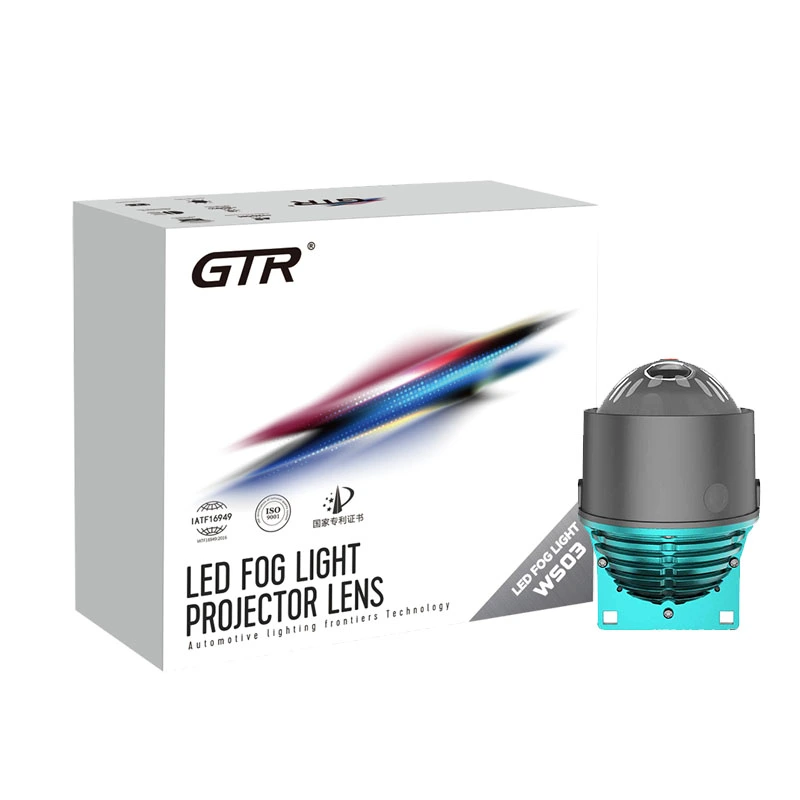
What Makes an LED Fog Light Different From a Headlight
An LED fog light is a low-mounted auxiliary lamp designed to project a wide, flat beam beneath fog, rain, or snow, illuminating the road surface without reflecting light back into the driver’s eyes. It differs from a headlight in beam shape, mounting height, and intended use.
Headlights throw a long, tapered beam down the road. Fog lights throw a short, broad beam across it. That distinction shapes everything that follows: where you mount them, how you aim them, and when you should actually switch them on.
A common mistake is treating fog lights as a second set of headlights. They are not. Used correctly, they supplement your low beams in low-visibility conditions. Used incorrectly, they become a source of glare for everyone on the road, including you.
Installation: Step-by-Step for Bulb Replacements
Replacing a halogen fog light bulb with an LED unit is one of the more approachable upgrades a car owner can do. On many vehicles, you can reach the fog light housing from behind the bumper or through a small access panel in the wheel well. On others, you may need to remove the bumper cover or drop the undertray.
Here is the general process. Always consult your vehicle’s service manual for specifics.
- Disconnect the battery. Fog light circuits are usually low-amperage, but disconnecting the negative terminal prevents accidental shorts.
- Locate the fog light housing. It is typically behind the bumper, accessible from underneath or through the wheel arch liner.
- Remove the connector and retaining clip. Twist or unclip the bulb holder and pull the bulb straight out. Do not touch the glass of a halogen bulb with bare fingers; oils can cause it to fail.
- Insert the LED bulb. Align the locating tabs, then twist or clip it into place. Do not force it. If it does not seat smoothly, you may have the wrong fitment.
- Rotate for beam alignment. If your LED bulb has an adjustable collar, use it. Loosen the collar, rotate the bulb until the LED chips face left and right (not up and down), then lock it down.
- Reconnect the plug and test. Turn on the fog lights and check that both sides illuminate evenly with no flicker.
- Reinstall any removed panels. Check that wiring is not pinched or resting against hot or moving components.
Tools You Will Actually Need
- A trim removal tool set (for plastic clips and panels)
- A socket set with extensions for tight spaces
- Work gloves and a flashlight or headlamp
- Dielectric grease for the connector
- Zip ties for securing excess wiring
A word of caution: if your vehicle requires bumper removal and you are not comfortable with that level of disassembly, a professional installation is worth the cost. Damaged bumper clips and cracked mounting points cost more to fix than the install itself.
Installing LED Fog Light Bars and Auxiliary Lamps
Auxiliary LED fog light bars are a different job entirely. These are typically mounted to a bull bar, roof rack, or custom bracket, and they require their own wiring harness, relay, and switch.
Key installation considerations:
- Mounting rigidity. A light bar that vibrates will throw its beam in inconsistent directions and may fatigue its mounting bolts over time.
- Wiring gauge. Match wire gauge to the current draw of the bar. Undersized wire overheats and creates voltage drop.
- Relay and fuse. Never wire a high-power light bar directly to a switch without a relay and an appropriately rated fuse.
- Switch placement. Choose a location you can reach without taking your eyes off the road.
- Waterproofing. Seal all connections with heat shrink and dielectric grease, especially if the bar sits low on the vehicle.
Aiming Your Fog Lights Correctly
Fog lights should be aimed low and slightly downward so the beam strikes the road surface about 15 to 30 feet ahead of the vehicle. The top edge of the beam should fall below the horizontal centerline of the lamp to avoid glare for oncoming drivers.
Aiming is the step most people skip. It is also the step that determines whether your upgrade helps or hurts.
Here is a simple aiming procedure you can do in your driveway:
- Park on a level surface facing a wall, about 25 feet away.
- Measure the height of your fog light center from the ground. Mark that height on the wall with tape.
- Turn on the fog lights. The top edge of the beam pattern should sit at or slightly below the tape line.
- If the beam rises above the line, adjust the housing aim screw (usually a vertical adjuster on the back or bottom of the housing) until it drops.
- Check the horizontal spread. Both sides should be roughly symmetrical, with a slight outward bias if your housing is designed that way.
Repeat this process after any suspension work, tire size change, or bumper removal. Small changes in vehicle stance change the beam angle.
Understanding Color Temperature in Real Driving Conditions
Color temperature is not a styling choice. It is a functional decision that affects what you can see and how tired your eyes feel after a long drive.
| Color Temperature | Appearance | Best Conditions | Trade-off |
|---|---|---|---|
| 2700K–3000K | Warm yellow | Dense fog, heavy snow, dust | Lower perceived brightness on clear roads |
| 4000K–4300K | Neutral white | Mixed weather, all-round use | Less aesthetic match with modern headlights |
| 5000K–6000K | Cool white | Clear nights, dry roads | More glare in wet or foggy conditions |
| 6500K+ | Blue-white | Styling preference | Poor performance in moisture, higher eye strain |
For riders and drivers in tropical climates with frequent heavy rain, a 3000K yellow fog light tends to outperform a 6000K white one, even though the white one looks brighter on a specification sheet. The reason is physics: longer wavelengths scatter less in water droplets.
Fitment Notes by Vehicle Type
Passenger Cars and SUVs
Most passenger vehicles use H11, H8, or H16 fog light bulbs. Some newer models use proprietary LED modules that cannot be upgraded with a simple bulb swap. Check whether your fog light housing uses a serviceable bulb before ordering.
Motorcycles and Scooters
Motorcycle charging systems are smaller than car systems. A pair of 30W LED fog lights draws 60W total, which is manageable on most bikes above 250cc. Smaller machines may need a lower-power option or a direct-to-battery harness with a relay. Vibration is also more severe on two wheels, so secure mounting and vibration-resistant construction matter more than raw output.
24V Commercial Trucks
Heavy trucks, buses, and off-highway equipment often run 24V systems. A standard 12V LED fog light will fail instantly if connected to 24V. You need a product explicitly rated for 24V operation, or a step-down converter sized for the load. Do not assume that “9–32V” claims on a product page are accurate without verification from the manufacturer.
Auxiliary and Off-Road Use
Off-road fog light bars are typically wired to a separate switch and are not legal for on-road use in most jurisdictions. Keep them on a dedicated circuit and use them only where permitted.
Maintenance: Keeping Your LED Fog Lights Performing
LED fog lights need less maintenance than halogen, but they are not maintenance-free.
- Clean the lens regularly. Road grime and bug residue reduce output and can cause hot spots. Use a soft cloth and mild soap.
- Inspect connectors annually. Look for corrosion, moisture, or loose pins. Apply dielectric grease to prevent future issues.
- Check aim after any front-end work. Even a minor bump can shift a housing.
- Listen for fan noise. If your bulb uses an active cooling fan, a sudden increase in noise or a complete stop can indicate bearing wear. Replace the bulb before it overheats.
- Watch for color shift. A gradual shift toward blue or a noticeable dimming suggests thermal degradation. This is more common in cheap LEDs with poor heat management.
Common Installation Mistakes and How to Avoid Them
- Forcing a bulb into the wrong socket. If it does not seat with light pressure, stop. You may have the wrong fitment.
- Ignoring polarity. Some LED bulbs are polarity-sensitive. If one does not light up, flip the connector.
- Skipping the CANbus check. Flickering or error messages after installation usually mean the vehicle needs a decoder module.
- Leaving the beam aimed too high. This is the most common cause of complaints from other drivers.
- Not sealing connections. Moisture in a connector causes intermittent faults that are frustrating to diagnose.
- Over-torquing retaining clips. Plastic clips break easily. Snug is enough.
Frequently Asked Questions
Can I install LED fog lights myself?
Yes, on most vehicles. Bulb replacement typically takes 20 to 60 minutes depending on access. Full assembly or light bar installations are more involved and may require bumper removal, wiring, and relay setup.
Do I need to re-aim my fog lights after installing LEDs?
Yes. LED bulbs often sit at a slightly different optical position than the original halogen. Always check and adjust aim after installation.
Why do my new LED fog lights flicker?
Flickering usually indicates a CANbus compatibility issue. The vehicle’s computer is pulsing the circuit because it detects lower-than-expected current draw. A decoder module or anti-flicker harness resolves this in most cases.
How do I know if my fog lights are aimed correctly?
Park 25 feet from a wall on level ground. The top edge of the beam should fall at or slightly below the height of the lamp center. If it rises above, lower the aim.
Can I use LED fog lights in heavy rain?
Yes, and they tend to perform better than halogen in rain if you choose a lower color temperature. Yellow or neutral white reduces glare from wet surfaces.
What is the difference between a fog light and a driving light?
A fog light has a wide, low beam for poor visibility. A driving light has a longer, narrower beam for high-speed night driving. They serve different purposes and should be aimed differently.
Getting It Right the First Time
Installation and setup are where most fog light upgrades succeed or fail. The product matters, but so does the work you put into mounting, wiring, aiming, and maintaining it. A well-installed mid-range LED fog light will outperform a poorly installed premium one every time.
If you want lighting components engineered for consistent fitment and stable thermal performance across a wide range of vehicles, explore the GTR range at www.rhgtr.in. Our team supports installers and distributors with fitment guidance, technical documentation, and after-sales service.
See the road. Aim it right. Keep it that way.