
You installed your new H11 bulb, twisted it into place, plugged in the connector, and turned on your headlights. Nothing. Or maybe it flickers. Or it lights up for 30 seconds and dies.
Before you return the bulb or call a shop, run through this diagnostic flow. We’ve diagnosed over 1,500 failed H11 headlight bulb installations in our workshop at Ronghai Optoelectronics. Most problems trace back to three mistakes: wrong connector fit, ignoring CANbus requirements, or poor thermal management.
This guide walks you through every possible failure mode — and tells you exactly how to fix each one.
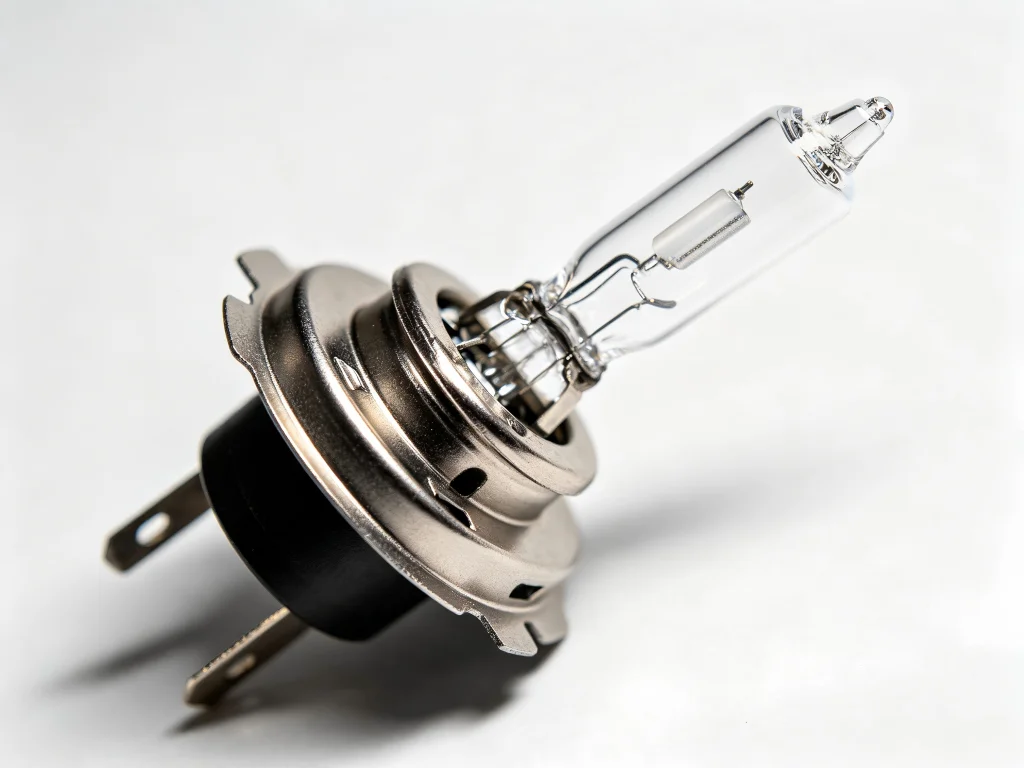
Step 1: The Connector Check — Does It Actually Fit?
Not all H11 connectors are identical. While the base looks the same, some vehicles use a slightly different tab configuration. Forcing a mismatched bulb damages both the bulb and your factory harness.
OEM H11 connectors have two flat prongs with a specific orientation. However, certain Toyota and Subaru models use a modified H11 connector with a smaller center tab. One Toyota 4Runner owner discovered their “H11 LED bulb has no ‘tab’ in the middle of the pins,” making it impossible to secure.
Before ordering any H11 headlight bulb, remove your existing halogen bulb and visually compare the connector base to product photos. Look closely at the plastic tab shape between the two metal pins. If you’re unsure, measure the pin width and tab height with a caliper and contact support.
Quality aftermarket suppliers like GTR include detailed connector diagrams on their product pages. The solution for mismatched connectors? Either source a bulb with the correct tab or use a quick adapter harness.
Step 2: Polarity — The 60% Solution
LED bulbs are polarity-sensitive. If your H11 bulb doesn’t light at all, this is your first suspect. Unplug the bulb, rotate the connector 180 degrees, and plug it back in.
This simple fix resolves about 60% of “dead bulb” complaints.
If the bulb still doesn’t light, test it in the other side’s socket. Works there? Then your vehicle’s original socket has an issue.
Step 3: CANbus — Flickering and Dashboard Warnings
Dashboard warnings and flickering are almost always electrical compatibility issues. If flipping the connector doesn’t solve it, your vehicle’s computer is detecting lower power draw from the LED compared to the halogen it expects.
Here’s where things get nuanced:
- Some premium bulbs integrate CANbus compensation internally — these are true plug-and-play solutions.
- Others require inline decoders (also called anti-flicker modules). These are small resistor boxes that simulate halogen load. They work, but they generate heat and can fail over time.
- Beware of “resistor-ready” claims — one Civic owner reported that after installing a “CANbus ready” H11 LED bulb, they still got flickering. The problem? The bulb was only “resistor-ready” — it had a port for an external decoder, but didn’t include one.
If your turn signals (some vehicles use H11 for front indicators) flash rapidly, that’s another CANbus symptom. The solution is the same: load resistors or a CANbus-ready bulb.
Step 4: Thermal — The 10-Minute Shutdown
Your new H11 bulb works perfectly for 10 minutes, then shuts off. This is thermal throttling — the bulb overheats and self-protects. It usually means inadequate cooling or ambient temperature inside the housing is too high.
How to spot a thermal problem before you install:
Hold the H11 headlight bulb in your hand and examine the cooling system:
- Passive heat sinks (ribbed metal fins): Run your finger along the fins. Cheap bulbs use thin, flimsy aluminum that bends easily. Quality bulbs use thick aviation-grade aluminum with deep fins for maximum surface area.
- Active fans: Spin the fan gently with your fingertip. It should rotate smoothly without wobble. Listen for grinding noises. Replaceable fans are a plus — when one fails, you can swap it instead of replacing the whole bulb.
- Thermal separation: Look for a physical gap or insulation layer between the LED chip board and the driver circuit.
One Amazon reviewer learned this the hard way. Their mechanic warned that the bulb had “no cooling device” and would “burn very fast.” Three weeks later, one side failed completely.
Step 5: Beam Pattern — The Garage Door Test
Even after installation, you need to verify your H11 headlight bulb isn’t blinding traffic or leaving dark spots. The garage door test takes five minutes and requires no special tools.
Park 25 feet from a flat wall (garage door works perfectly). Turn on your low beams and mark the top of the beam cut-off with painter’s tape.
Swap to your new LED H11 bulb (only one side at a time) and compare:
- The cut-off line should be at the same height or slightly lower, never higher.
- The light pattern should be even, without bright hotspots or jagged edges.
- If the new bulb’s cut-off sits above your tape mark, you’re blinding oncoming drivers.
- If the pattern has dark streaks or rings, the LED chip position doesn’t match your housing.
In both cases, return the bulb — no amount of adjustment will fix poor optics.
One driver who performed this test found that while their new LEDs “matched halogen cut-off height,” the pattern “was not as consistent” across the full width. That inconsistency translates to reduced peripheral vision at night — a safety risk they hadn’t noticed until the wall test revealed it.
Step 6: The Connector Melting Risk No One Talks About
You’ve probably seen photos of brown, melted H11 connectors. That’s not always from cheap LEDs. Factory halogen bulbs run extremely hot — the connector can degrade after years of heat cycles. When you install LEDs, the connector is already brittle.
Inspect your factory connector before installing any new bulb. If the plastic looks discolored or feels crunchy, replace the connector pigtail first. It’s a $10 part and ten minutes with wire strippers.
Skipping this step means your new H11 headlight bulb may work perfectly, only to lose connection a month later due to a connector that was failing anyway. For a permanent fix, some enthusiasts upgrade to ceramic H11 connectors, which withstand much higher temperatures.
Quick Reference: H11 Bulb Specs at a Glance
| Specification | Halogen H11 | LED H11 (Premium) |
|---|---|---|
| Wattage | 55W | 16–25W |
| Lumens | ~1,000 | 3,500–6,000 |
| Base type | PGJ19-2 | PGJ19-2 (with H11 tab) |
| Polarity sensitive | No | Yes |
| Average lifespan | 320 hours | 30,000+ hours |
| Common applications | Low beam, fog light, some DRLs | Low beam, fog light |
Data source: Ronghai Optoelectronics workshop diagnostics
7 Most Common H11 Headlight Bulb Problems — Quick Fix Guide
- Bulb doesn’t light at all: Flip the connector 180 degrees (polarity). If still dark, test the bulb in the other side’s socket.
- Light flickers constantly: Needs CANbus decoder or a bulb with integrated driver. Some vehicles require decoders even with premium bulbs — check your specific model on forums.
- One side dimmer than the other: Swap bulbs left-to-right. If the dimness moves with the bulb, that bulb is defective. If it stays on the same side, check your vehicle’s ground wire or fuse box.
- Beam pattern has a “V” or batwing shape: LED chip is too long. Return the bulb and buy one with a shorter chip array that matches your halogen filament length (typically 4–6mm for H11).
- Bulb fits but dust cap won’t close: Your housing has limited rear clearance. You need a “mini” or “compact” H11 headlight bulb with a shorter heat sink or fan housing.
- New bulbs work but radio gets static: Poor electromagnetic shielding in the bulb’s driver. This is rare but dangerous (interferes with TPMS and keyless entry). Replace immediately with a shielded bulb.
- Bulb works for 10 minutes then shuts off: Thermal throttling. Upgrade to bulbs with active fans or larger heat sinks.
When to Stick with Halogen
LED isn’t always the answer. Keep halogen H11 headlight bulbs in these situations:
- Your vehicle has a notoriously sensitive CANbus system that resists every decoder (some 2015–2018 BMW models).
- You live in extreme cold (below -30°C / -22°F) where LED warm-up time affects output — though modern LEDs handle this well.
- Your headlight housings are badly oxidized or cracked. LEDs will only make the poor beam pattern more obvious. Fix the housing first.
- You’re selling the car in six months and don’t want to explain the upgrade to the next owner.
In these cases, a fresh set of H11 halogen bulbs for $20–30 is the sensible choice. Upgrade only when you plan to keep the vehicle and drive at night regularly.
Your Installation Time by Vehicle
How long should an H11 headlight bulb replacement actually take? It varies dramatically by vehicle design:
- Full-size truck (F-150, Ram): 10–15 minutes — no tools needed (twist-off cap)
- Compact car (Civic, Corolla): 15–20 minutes — none or small screwdriver
- SUV (CR-V, RAV4): 20–30 minutes — ratchet (some battery removal)
- European sedan (3-series, A4): 30–45 minutes — trim tools, T20/T25 torx
Before starting your H11 headlight bulb upgrade, search YouTube for your specific model + “headlight replacement”. If you see plastic clips, tight access, or mentions of “bumper removal,” consider a shop. For most Japanese and American vehicles, it’s truly a DIY job.
Keep this guide bookmarked. When you’re standing in the parking lot or scrolling through product pages at midnight, the diagnostic flow above will save you from buying the wrong H11 headlight bulb and wasting another weekend re-doing the job.